6 / 11 / 13
DESIGN FOR PRINT / OUGD504CREATIVE SUITE
PHOTOSHOP WORKSHOP
The title bar at the top of you image will always show the colour mode that that particular image is formatted in.
To change the colour mode of the image, go to images on the toolbar and select mode. Because photographic images have been taken on an image and firstly shown on a screen the image automatically opens as an RGB file. To print the image the mode has to be changed to CMYK so it is suitable for print.
Changing the image from RGB to CMYK alters the colours with in the image.
There are colours you can produce in the RGB colour mode that cannot be reproduced through the CMYK colour mode. the RGB colour gamete is greater than the CMYK colour gamete.
To work within photoshop without having issues with colour,
RGB is photoshops default code.
There are more options available for a document that is set up in RGB than there is for CMYK.
In the view menu you have an option called the gamut warning. The grey areas that appear are the colours that are not available.
You can block some of the colours form becoming desaturated by making and adjustment layer. this lets you use the mask to apply this adjustment or take it away. this lets you just alter the areas of the image that you need to.
From adobe Photoshop 'printing images in a commersial print mode'
Work in RGB mode until you finish editing your image. Then convert the image to CMYK mode and make any additional color and tonal adjustments. Especially check the highlights and shadows of the image. Use Levels, Curves, or Hue/Saturation adjustment layers to make corrections. These adjustments should be very minor. Flatten the file if necessary, then send the CMYK file to the professional printer.
If you want to create art work form scratch or add to an existing image you can work with colour swatches.
To set up swatches that allow us to work consistently with colour, you can clear your palette and build it up to your requirements.
You can save the swatch to the document you are working in or by simply selecting save swatches. if you want to use the swatch with in the other adobe softwares you can save in as 'save swatches for exchange.
You can save the swatches and go back to the default selection, if you want to use the swatch you have made then select replace and this will give you the swatches you have made.
The bottom icon indicates web-safe colours and the upper icon indicates which colours are outside the colour gamut of CMYK.
Once you have a printable colour you can add it to your swatch palette by clicking in the palette and approving the colour you wish to enter.
USING SPOT COLOURS.
Spot colours are usually cheaper than using cmyk colour modes.
If you select the colour libraries option, this will allow you to choose an colour that applies to a colour matching system such as pantone.
You can use the arrow along the side to view the different strips of colour options or if you type a specific number, this will automatically find the colour match.
If you apply colour to an image that is set for CMYK, the colour is automatically supported by CMYK
A photoshop document can only support one colour mode. if my image is CMYK and i apply colour into that image this will have to apply to the CMYK colour mode so it is supportable when printing.
There is no option in the image toolbar for a spot colour mode for print.
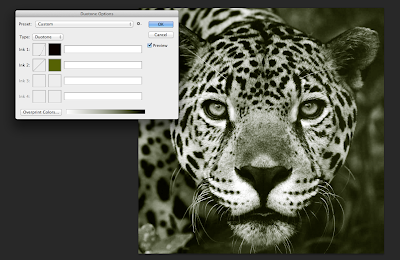
If we were to print this image it would only need black ink. to set this document up for print you can use a Duo tone.
You can only convert to a duo tone mode if the original document is grayscale.
This allows you to channge the base ink colour for your monotone image.
This icon lets you adjust the curvitur of the colour in the image.
The curve option allows you to map your old ink to your new ink.
You can also adjust the settings to allow you to have two inks present in the image.
its important that you save your image as a photoshop file so it is that available to use in other softwares.
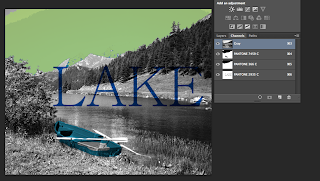
another technique to use when appliying spot colour is through the channels of the image.
The channels reflect the colours of the image.
A CMYK image will have the 4 colours shown with in the channels. For rgb there will be 3 channels for each colour. Where it is darker within the individual windows there is more of this colour, if it is lighter there is less.
for Grayscale there is only one.
The information with in each channel dictates how the print with come out.
There is an option to create a new spot channel which will allow us to addcolour.
You can take a paint brush and paint with in that chanel.
This applies your spot colour to this channel. tO TAKE AWAY THAT COLOUR AGAIN you can hold down x while you paint over the image.
Inks are transparent like a screen print. You can change the solidity to effect tha opaqueness of the ink.
This can help you to simulate the effects of a screen print as well as help you to set up printouts to use for a screen printing methods such a spot varnishing.
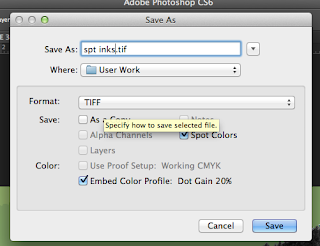
When saving you image, having the spot inks box ticked allows the channel information to save and travel with the image.


No comments:
Post a Comment